First we will need to include contexthub in template level. So that we will able to use target mode on page level.
To do That we will add below code in header of base template.
<!--/* Include Context Hub */-->
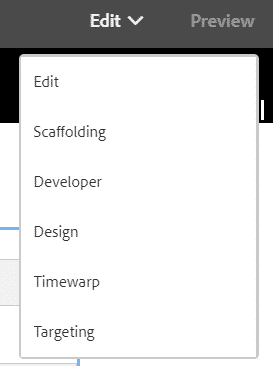
<sly data-sly-resource="${'contexthub' @ resourceType='granite/contexthub/components/contexthub'}"/>Ones above part done you will be able to see target mode under edit dropdown
.
Create Custom Audiences
- Create custom audience under personalization > audiences > audience Name
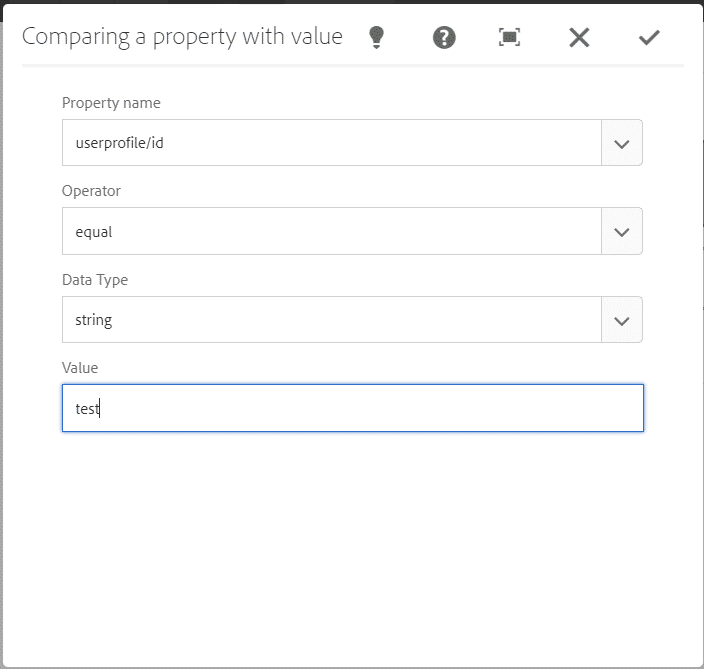
- Now edit audience and add segment resolver condition.
Based on this condition contexthub will decide to load content for this segment or other.
for our reference will use userprofile/id equals test.
Remember userprofile is important as we are going to create contexthub module based on this.
- Now create new activity as per you like under personalization > Activities
- Add your created audience under activity.
Create Custom Contexthub Module and Store
- To create custom contexthub Module go to TOOLS > SITES > CONTEXTHUB
- Now go inside default > contexthub configuration.
- Here we will need to create two part contexthub UI Mode and contexthub store.


ContextHub UI module
- profileCustom (you can give any name) will be responsible to load the module in preview mode.
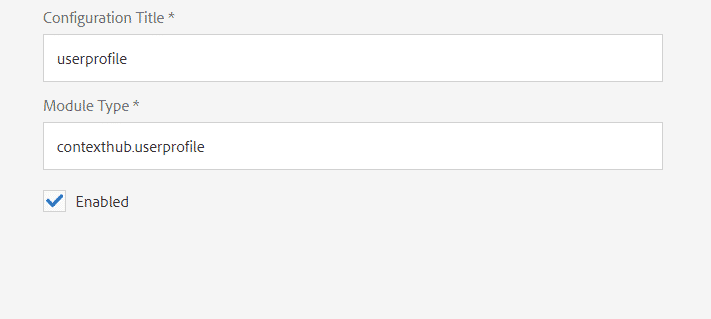
- inside profileCustom create new ContextHub UI module with name userprofile. remember we are using same name in segment above.
- this userprofile will have properties as below.

- This Module Type is very important as we will map our contexhub JavaScript file using it.
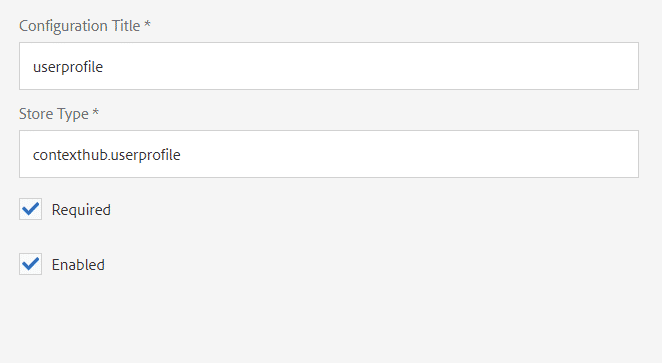
ContextHub Store Configuration
- create userprofile contextHub Store as shown in above image.
- Edit userprofile and add below properties as shown in image.

Contexthub module JavaScript and ContextHub Store Javascript
Now here comes the main part to make contexthub module available in preview mode. Also to able to resolve contexthub from JavaScript.
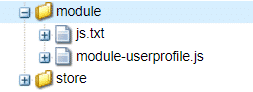
- First we will need folder for contexthub javascript under etc/design/your-project-name/
- Name it like personalizationContexthub (provide any name you like).
- After that we will create two cq:ClientLibraryFolder with name Module under personalizationContexthub folder
- Module will have categories as mention below
| categories | String[] | contexthub.module.contexthub.userprofile |
- Remember contexthub.userprofile is mapped with Contexthub UI Module we created in sites/contexthub under profileCustom
- Above property will load javascript. From this Module folder to show dropdown in preview.

- Now in module-userprofile.js add below mentioned JavaScript
(function($) {
    'use strict';
    var defaultaccounname = '';
    var defaultId;

    var ProfileRenderer = function() {
        var url = '/content/dam/accountidname.json';
        var userId = "accounts";
        $.getJSON(url, function(data) {
            console.log("in get json ");
            var users = [];
            let accArray = [];
            let keysArray = Object.keys(data);
            for (var i = 0; i < keysArray.length; i++) {
                if (keysArray[i] == userId) accArray = (data[keysArray[i]]);
            }
            var count = 0;
            $.each(accArray, function(i, user) {
                var record = {
                    title: user.accountName,
                    icon: user.icon,
                    data: {
                        id: user.id,
                        accountname: user.accountName
                    }
                };
                users.push(record);
                if (count == 0) {
                    defaultaccounname = user.accountName;
                    defaultId = user.id;
                    count = 1;
                }
            });

            users = $.makeArray($(users).sort(function(a, b) {
                return ((a.data.accountname).toUpperCase() === (b.data.accountname).toUpperCase()) ? 0 : (((a.data.accountname).toUpperCase() < (b.data.accountname).toUpperCase()) ? -1 : 1);
            }));

            this.users = users;
        }.bind(this));
    };


    ContextHub.Utils.inheritance.inherit(ProfileRenderer, ContextHub.UI.BaseModuleRenderer);

    ProfileRenderer.prototype.defaultConfig = {
        icon: 'coral-Icon--user',
        title: 'Seller Accounts',
        clickable: true,
        editable: {
            key: '/userprofile'
        },
        storeMapping: {
            p: 'userprofile'
        },
        template: '<p class="contexthub-module-line1">{{i18n "Seller Name"}}</p>' +
            '<p class="contexthub-module-line2">{{p.displayName}}</p>',
        listType: 'checkmark',
    };

    ProfileRenderer.prototype.render = function(module) {
        var config = $.extend(true, {}, this.defaultConfig, module.config);
        module.config = config;
        return this.uber('render', module);
    };

    ProfileRenderer.prototype.getPopoverContent = function(module, popoverVariant) {
        var config = $.extend(true, {}, this.defaultConfig, module.config);
        if (!popoverVariant || popoverVariant === 'default') {
            var list = this.users;
            if (list && config.skipUsers) {
                list = $.grep(list, function(user, i) {
                    return config.skipUsers.indexOf(user.data.id) === -1;
                });
            }
            if (list && config.storeMapping && config.storeMapping.p) {
                var store = ContextHub.getStore(config.storeMapping.p);
                if (store) {
                    var accountname = store.getItem('accountname');
                    if (accountname) {
                        $.each(list, function(i, user) {
                            user.selected = accountname.indexOf(user.data.accountname) === 0;
                        });
                    }
                }
            }
            config.listType = 'checkmark';
            config.list = list;
        }
        module.config = config;
        return this.uber('getPopoverContent', module);

    };
    ProfileRenderer.prototype.onListItemClicked = function(module, position, data, event) {
        if (data.id) {
            var config = $.extend(true, {}, this.defaultConfig, module);
            if (config.storeMapping && config.storeMapping.p) {
                var store = ContextHub.getStore(config.storeMapping.p);
                if (store) {
                    store.loadProfile(data.accountname, data.id, true);
                }
            }
        }
    };
    ContextHub.UI.ModuleRenderer('contexthub.userprofile', new ProfileRenderer());
}(ContextHubJQ));- Change json path to your dam location json.
- Below is the overview of json structure which used for above dropdown list
{
  "accounts": [
    {
      "accountName": "test account 1",
      "id": "test"
    },
    {
      "accountName": "test account 2",
      "id": "ts"
    }
  ]
}
In conclusion we will able to see the custom contexthub module under page preview

ContextHub Store JavaScript
- Now to Map contexthub store configuration to store javascript. We will create store-contexthub.js under store folder.
- and then add below javascript to store-contexthub.js.
(function($) {
	'use strict';

	var defaultConfig = {
		initialValues : {
			id : 'test',
			accountname : 'test'
		}
	};
	var ProfileStore = function(name, config) {
		this.config = $.extend(true, {}, defaultConfig, config);
		this.init(name, this.config);
		this.queryService(false);
	};
	ContextHub.Utils.inheritance.inherit(ProfileStore,
			ContextHub.Store.PersistedJSONPStore);

	ProfileStore.prototype.loadProfile = function(accountname, id,
			initialLoader) {
		var store = ContextHub.getStore('userprofile');
		store.setItem('accountname', accountname);
		store.setItem('id', id);
		this.pauseEventing();
		var result = $.extend(true, {}, store.userprofile);
		result = ContextHub.Utils.JSON.tree.setItem(result, 'accountname',
				accountname);
		result = ContextHub.Utils.JSON.tree.setItem(result, 'id', id);
		var displayName = result.accountname;
		result = ContextHub.Utils.JSON.tree.setItem(result, 'displayName',
				displayName);
		this.setItem('/', result);

		this.resumeEventing();
		store.queryService(true);
	};

	ContextHub.Utils.storeCandidates.registerStoreCandidate(ProfileStore,
			'contexthub.userprofile', 0);

}(ContextHubJQ));- And finally we will need to call contexthub resolve segment in publish mode. By using below javascript in head.html of base template
<sly data-sly-test="${!(wcmModes.wcmmode.edit || wcmModes.isTouchAuthoring || wcmModes.wcmmode.design) }">
    <script  type = "text/javascript">
        $(window).on('load', function() {
            var corpstore = ContextHub.getStore("userprofile");
            corpstore.loadProfile("test1","test1",false);
        });
    </script>
</sly>
and at last these test1,test1 parameter we can pass from anywhere. Like sessionstorage / localstorage of based on any javascript condition.
Check your page in wcmmode=disabled or in publisher.
Note that you will have to author the content for your audiences. to see the different content. This you can do from authoring content from target mode of component.
If you want to check on how to author audiences in target please refer this link.